Mixers & Stirrers
Overhead Mixer Maintenance and Troubleshooting
November 4, 2024
Technical Team
Technical Guide
Article Summary
Complete maintenance guide for Cole-Parmer overhead mixers including motor service, shaft alignment, and torque calibration procedures.
# Overhead Mixer Maintenance and Troubleshooting
## Technical Overview and Specifications
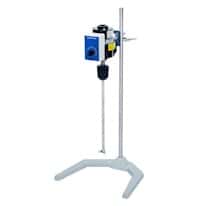
Cole-Parmer overhead mixers, including the SD, GP, and SP series, are precision mixing instruments designed for laboratory and pilot-scale applications. Technical specifications:
- **Motor Type**: Brushless DC with electronic speed control
- **Speed Range**: 10-2000 RPM continuously variable
- **Torque Rating**: 10-200 Ncm depending on model series
- **Chuck Capacity**: 0.5-13mm shaft diameter
- **Power Rating**: 25W to 200W motor power
- **Control Accuracy**: ±1 RPM digital display models
- **Construction**: Chemical-resistant housing with stainless steel components
- **Safety Features**: Overload protection, chuck guard, anti-splash design
## Safety Warnings and Precautions
⚠️ **MECHANICAL HAZARDS**
- Rotating shafts and impellers can cause serious injury
- Always install chuck guard before operation
- Never attempt to stop rotating shaft by hand
- Use appropriate eye and hand protection during operation
⚠️ **ELECTRICAL SAFETY**
- Disconnect power before any maintenance procedures
- Verify proper grounding of motor housing
- Use GFCI protection in wet laboratory environments
- Inspect power cord daily for damage from chemical exposure
⚠️ **CHEMICAL COMPATIBILITY**
- Verify material compatibility with process chemicals
- Use proper ventilation when mixing volatile or hazardous materials
- Implement proper spill containment procedures
- Never exceed maximum operating temperature for seals and O-rings
⚠️ **TORQUE AND OVERLOAD HAZARDS**
- Do not exceed maximum torque ratings for extended periods
- Monitor motor current to prevent overheating
- Use proper impeller selection for viscosity and volume
- Implement torque limiting for fragile vessel protection
## Common Failure Modes and Diagnostic Procedures
### 1. Speed Control and Motor Issues
**Symptoms:**
- Motor fails to start or runs intermittently
- Speed fluctuations or inability to maintain set RPM
- Excessive motor noise or vibration during operation
- Digital display shows error codes or incorrect readings
**Diagnostic Steps:**
1. **Motor Electrical Testing**
- Measure motor winding resistance (typically 10-50Ω per phase)
- Check motor insulation resistance to ground (>10MΩ)
- Test motor current draw under no-load conditions
- Verify proper voltage supply at motor terminals (±10% of rated)
2. **Speed Control Circuit Diagnosis**
- Test speed control potentiometer resistance curve (should be smooth)
- Check PWM output signal with oscilloscope (clean 20kHz typical)
- Verify encoder feedback signals for digital models
- Test thermal protection circuit operation
3. **Mechanical System Inspection**
- Check motor mounting and coupling alignment
- Inspect motor bearings for wear or contamination
- Verify shaft runout within specification (<0.002" TIR)
- Test motor cooling fan operation and airflow
### 2. Chuck and Shaft Problems
**Symptoms:**
- Chuck fails to grip shaft securely
- Excessive shaft runout or wobble
- Difficulty inserting or removing mixing shafts
- Chuck threads damaged or worn
**Diagnostic Steps:**
1. **Chuck Mechanism Inspection**
- Clean chuck jaws and threads with appropriate solvent
- Check jaw alignment and concentricity
- Measure chuck grip force with torque wrench
- Inspect chuck body for cracks or thread damage
2. **Shaft Condition Assessment**
- Measure shaft diameter and straightness
- Check for surface damage, corrosion, or wear
- Verify proper shaft material for application
- Test shaft-to-impeller connection integrity
3. **Alignment and Runout Testing**
- Use dial indicator to measure shaft runout
- Check motor-to-chuck alignment
- Verify proper bearing clearances
- Test system balance with standard test impeller
## Detailed Step-by-Step Repair Procedures
### Motor Service and Bearing Replacement
**Required Tools:** Bearing pullers, bearing press, torque wrench, multimeter, oscilloscope
**Pre-Service Preparation:**
1. **Documentation and Safety**
- Photograph motor connections and wiring configuration
- Record motor nameplate data and current performance parameters
- Disconnect all power and lock out electrical supply
- Prepare clean, organized work area with proper ESD protection
2. **Motor Disassembly**
- Remove motor from mixer housing following manufacturer's sequence
- Mark rotor position relative to stator for reassembly reference
- Carefully extract rotor assembly to avoid magnet damage
- Remove old bearings using proper pullers (never use heat or force)
**Bearing Inspection and Replacement:**
1. **Bearing Condition Assessment**
- Inspect bearing races for pitting, spalling, or discoloration
- Check bearing clearances and preload specifications
- Measure bearing runout and radial play
- Document bearing part numbers and specifications for replacement
2. **New Bearing Installation**
- Verify replacement bearings match original specifications
- Use proper bearing installation tools and techniques
- Apply appropriate bearing grease (high-speed, low-torque grade)
- Install bearings with correct orientation and seating force
- Check final bearing alignment and preload
3. **Motor Reassembly and Testing**
- Reassemble motor maintaining proper rotor-to-stator clearances
- Torque all fasteners to manufacturer's specifications
- Perform electrical testing: resistance, insulation, current draw
- Conduct initial no-load testing for noise and vibration
- Verify speed accuracy and control response
### Chuck Rebuild and Calibration
**Required Tools:** Chuck jaw puller, thread gauges, torque wrench, dial indicator
**Chuck Disassembly:**
1. **Preparation and Safety**
- Remove chuck from motor spindle
- Clean all external surfaces with appropriate solvent
- Document jaw position and adjustment settings
- Prepare organized workspace with small parts containers
2. **Jaw and Thread Inspection**
- Disassemble chuck jaws and spring mechanisms
- Check jaw surfaces for wear, damage, or contamination
- Test thread pitch and profile with gauges
- Measure jaw grip force and uniformity
**Rebuild Procedure:**
1. **Component Replacement**
- Replace worn jaws, springs, and O-rings with original parts
- Apply appropriate thread lubricant to adjustment mechanisms
- Verify proper assembly sequence and component orientation
- Test jaw movement for smoothness and concentricity
2. **Chuck Calibration**
- Install precision test mandrel in chuck
- Measure grip force at various shaft diameters
- Check concentricity and runout with dial indicator
- Verify maximum and minimum grip capacity
- Document calibration results and adjustment procedures
## Preventive Maintenance Schedule
### Daily Operations (High-Use Applications)
- **Visual Inspection**: Check for loose connections, unusual noise, or vibration
- **Chuck Function**: Test chuck grip and release mechanism operation
- **Safety Systems**: Verify chuck guard installation and overload protection
- **Cleaning**: Wipe down surfaces and remove chemical residues
### Weekly Maintenance
- **Lubrication**: Check chuck mechanism lubrication and motor bearing condition
- **Electrical Check**: Inspect power cord and connections for damage
- **Performance Verification**: Test speed accuracy with tachometer
- **Documentation**: Record operating hours and any unusual observations
### Monthly Service
- **Deep Cleaning**: Disassemble removable components for thorough cleaning
- **Alignment Check**: Verify shaft and chuck alignment with dial indicator
- **Electrical Testing**: Check motor insulation resistance and current draw
- **Control Calibration**: Verify speed and torque accuracy with standards
### Quarterly Maintenance
- **Motor Service**: Inspect motor bearings and cooling system
- **Chuck Rebuild**: Disassemble and service chuck mechanism as needed
- **Control System**: Test all safety functions and alarm systems
- **Performance Documentation**: Conduct comprehensive performance testing
### Annual Service
- **Complete Overhaul**: Full disassembly, inspection, and rebuild of major components
- **Bearing Replacement**: Replace motor bearings regardless of apparent condition
- **Calibration Certification**: Complete calibration with NIST-traceable standards
- **Safety Certification**: Verify all safety systems meet original specifications
## Professional Service Recommendations
**Factory Service Required For:**
- Motor rewind or magnet replacement requiring specialized equipment
- Control board repair requiring proprietary programming tools
- Precision machining of chuck or housing components
- Warranty repairs requiring factory authorization and certified parts
**Service Documentation Requirements:**
- Complete maintenance history with component replacement records
- Operating environment conditions including chemical exposure data
- Application details including typical mixing loads and duty cycles
- Performance trend data showing degradation patterns
**Authorized Service Centers:**
Contact Cole-Parmer technical support for nearest factory-authorized service facility. Provide complete model information, serial numbers, and detailed description of operating conditions for optimal service recommendations.
**Preventive Maintenance Benefits:**
- **Reduced Downtime**: Scheduled maintenance prevents unexpected failures
- **Extended Equipment Life**: Proper maintenance can double equipment lifespan
- **Performance Consistency**: Regular calibration maintains accuracy specifications
- **Safety Compliance**: Ensures continued operation within safety parameters
- **Cost Effectiveness**: Preventive maintenance costs 1/5 of emergency repair costs
**Maintenance Record Keeping:**
Maintain detailed logs including maintenance dates, procedures performed, parts replaced, calibration results, and performance measurements. This data is essential for predictive maintenance planning and warranty support.
Need Additional Support?
If you're experiencing issues not covered in this guide, our technical team is here to help.
Contact Technical Support